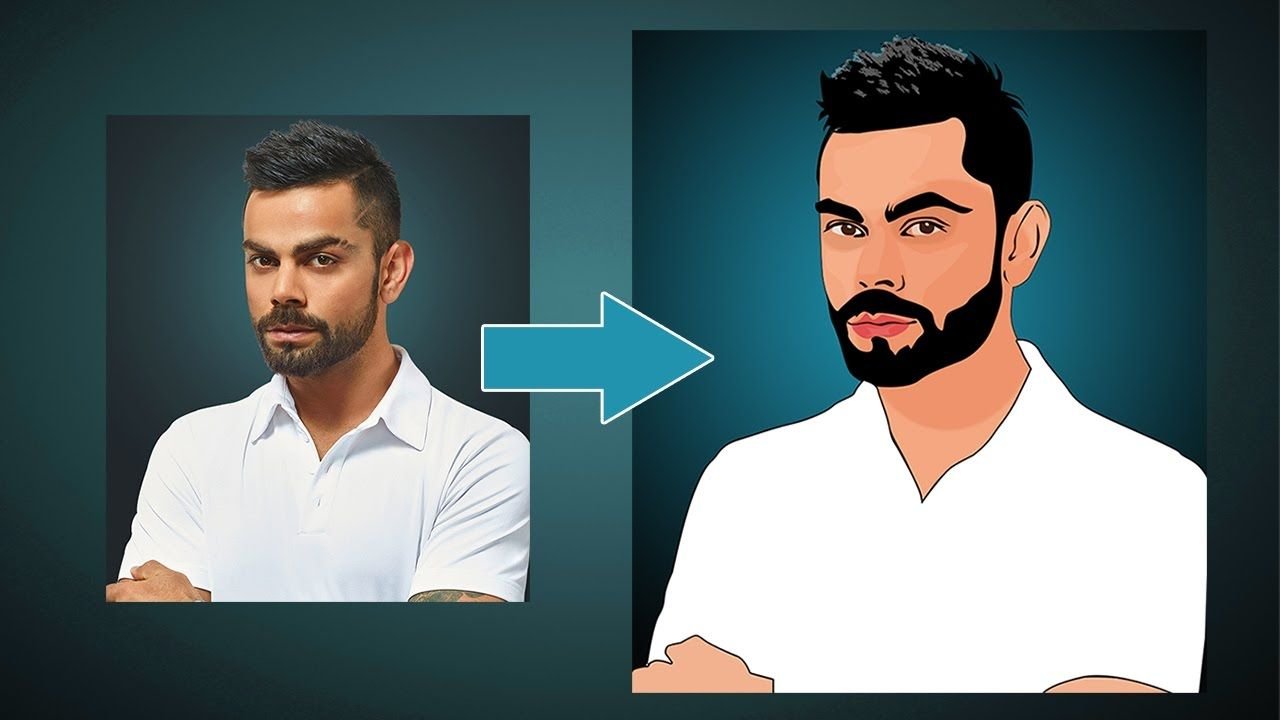
In today’s digital age, transforming ordinary photos into eye-catching cartoons has become a popular trend. Whether you want to create unique avatars Picture to cartoon effect, playful illustrations, or simply add a fun twist to your social media posts, converting photos to cartoons can offer endless creative possibilities. Here’s how you can effectively turn your snapshots into stunning cartoons.
1. Choose the Right Software or App
The first step in converting your photos to cartoons is selecting the right tool. There are numerous apps and software available, each offering different features and styles. Some popular options include:
- Prisma: Known for its artistic filters, Prisma can quickly turn your photos into colorful, cartoon-like images.
- ToonMe: This app specializes in creating cartoon portraits with a variety of styles.
- Adobe Photoshop: For those who prefer a more hands-on approach, Photoshop offers advanced tools for customizing cartoon effects.
When choosing a tool, consider what style you’re aiming for and the level of control you want over the final result.
2. Prepare Your Photo for Conversion
Before applying any cartoon effects, it’s essential to prepare your photo to ensure the best possible outcome. Here are a few tips:
- High-Quality Images: Use high-resolution photos to capture all the details. The better the quality of the original image, the better the cartoon will look.
- Good Lighting: Ensure the photo has even lighting. Photos with harsh shadows or overexposure may not convert well.
- Clear Subjects: The subject of your photo should be clearly defined. Avoid cluttered backgrounds that might distract from the main focus.
3. Apply Cartoon Effects
Once your photo is ready, it’s time to apply the cartoon effects. Depending on the software or app you’re using, this process may vary. However, most tools offer these common features:
- Filters: Apply a cartoon filter that best suits your style. You may have options ranging from simple line drawings to more complex, stylized effects.
- Adjustments: Fine-tune the cartoon effect by adjusting parameters like brightness, contrast, and saturation. Some tools also allow you to tweak the thickness of lines or the smoothness of colors.
- Layers: If you’re using advanced software like Photoshop, you can work with layers to add depth and detail to your cartoon. This allows you to isolate different parts of the image and apply unique effects to each one.
4. Enhance and Customize
To make your cartoon truly stand out, consider adding some custom touches:
- Backgrounds: Replace or enhance the background to fit the cartoon theme. You can use a plain color, a stylized pattern, or even another image.
- Text and Speech Bubbles: For a comic book feel, add speech bubbles, captions, or even fun sound effects like “Bam!” or “Pow!”.
- Additional Elements: Incorporate other design elements like stickers, icons, or props to add personality to your cartoon.
5. Save and Share Your Creation
After you’ve perfected your cartoon, it’s time to save and share it. Most apps and software allow you to save your creation in various formats like JPEG, PNG, or even GIF for animated cartoons. Make sure to choose a format that suits how you intend to use the image.
Sharing your cartoon on social media platforms is a great way to showcase your creativity. Many apps even offer direct sharing options, making it easy to post your cartoonized photo with just a few clicks.
6. Experiment and Have Fun
Finally, don’t be afraid to experiment with different styles and techniques. The beauty of converting photos to cartoons is the endless creative possibilities. Try different filters, play with colors, and explore new tools to discover what works best for you.
Converting your photos to cartoons is a fun and creative way to breathe new life into your images. With the right tools and a bit of imagination, you can easily transform any snapshot into a work of art. So grab your favorite photo, fire up your chosen software, and start cartoonizing!
To learn more about how to convert photo to cartoon visit site


